Are you dealing with dry rot, peeling paint, or infected wood, and wondering how to tackle the problem like a pro? Dry rot can be a silent, yet significant, issue for any home or building, leading to weakened structures, damaged aesthetics, and increased costs if left unchecked.
Dry rot, along with its common signs such as peeling paint and crumbling wood, can severely compromise the integrity of your home's wooden structures. If ignored, these issues can spread, causing extensive damage.
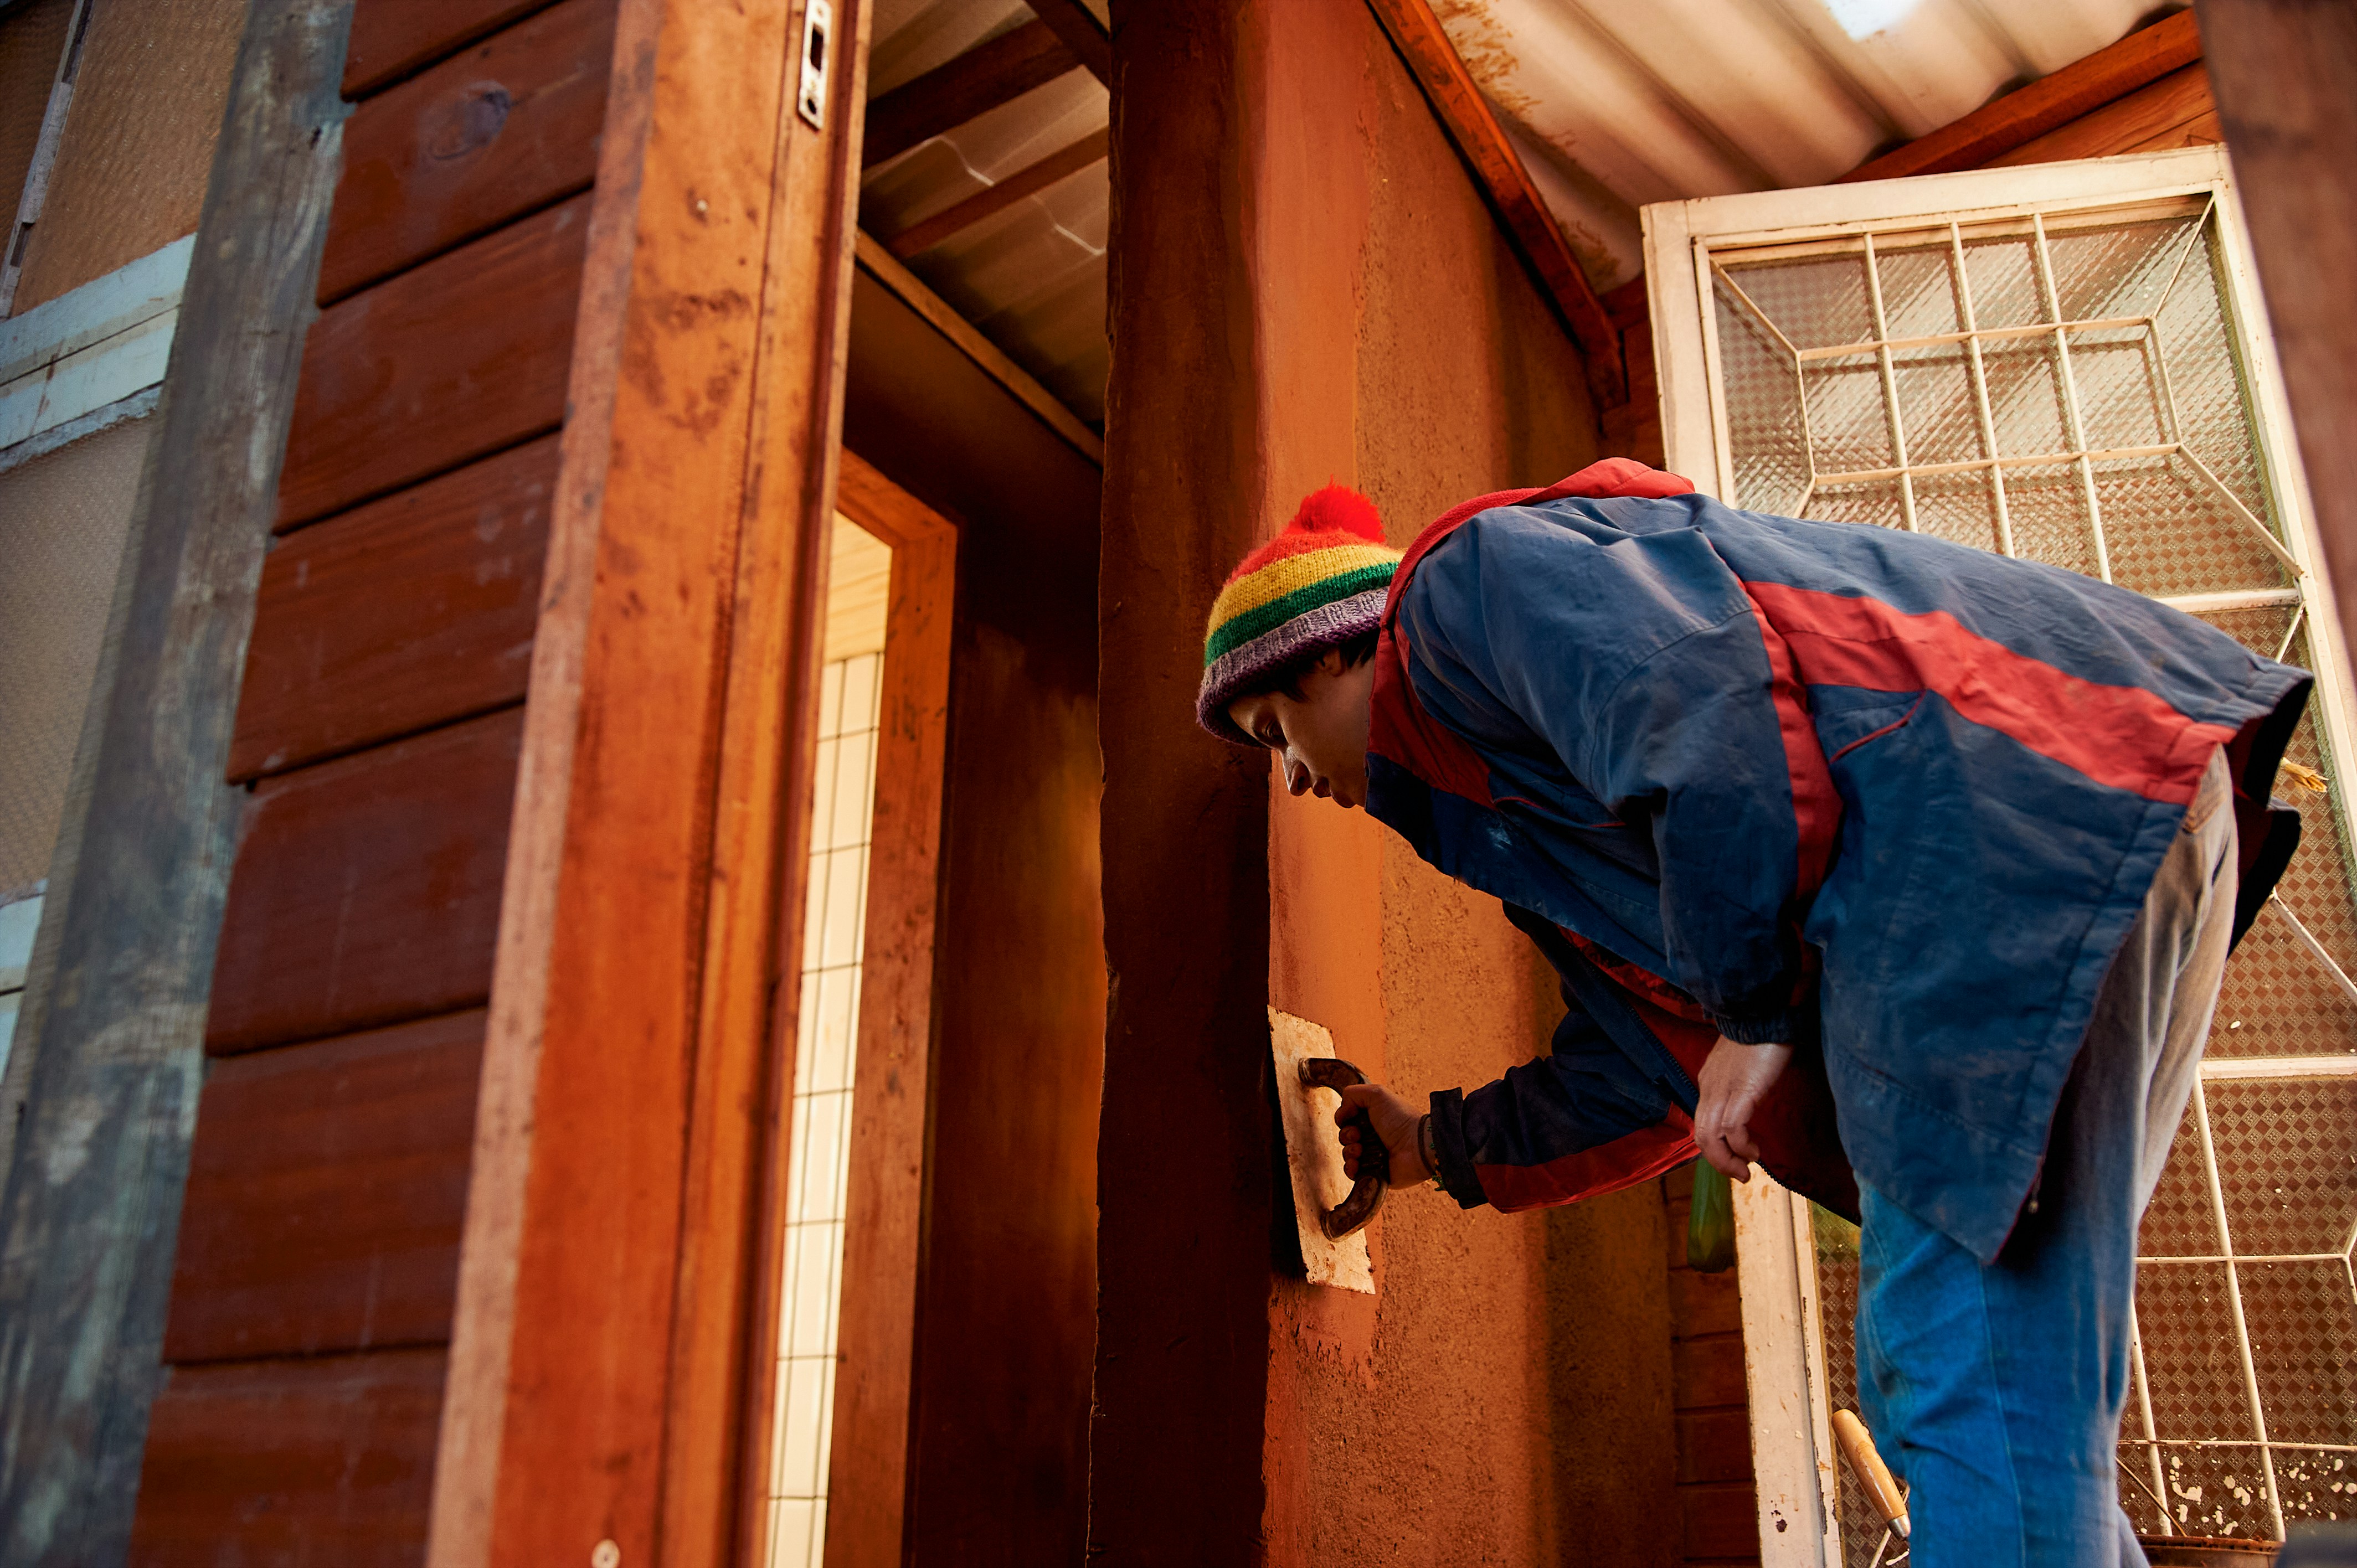
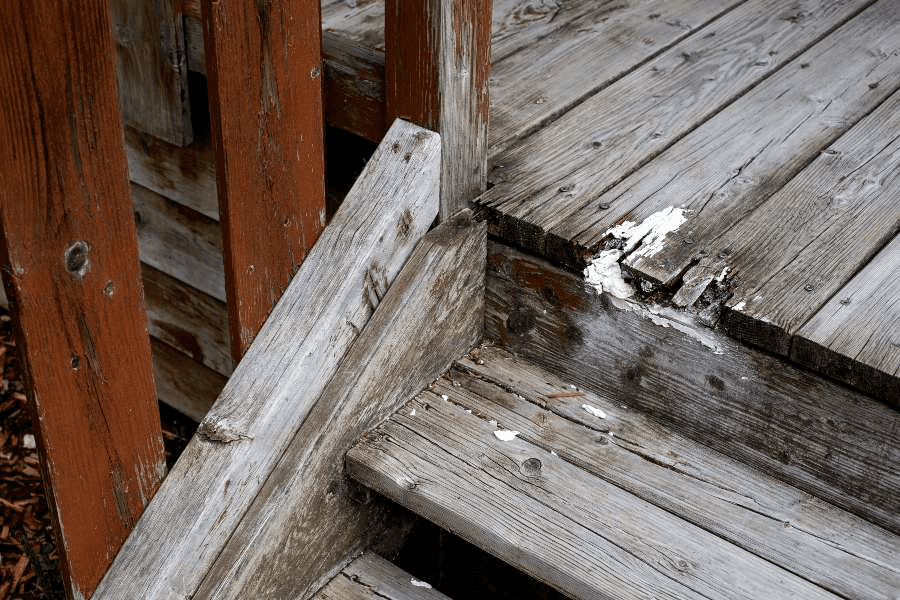
The sight of rotted wood can be disheartening, particularly when it undermines your home's stability and appearance. Repairing or replacing dry rot can seem daunting, especially when faced with affected areas spreading across key structural elements.
General Rot Repair offers an easy-to-follow guide on how to handle infected wood efficiently, from assessing the damage to using wood filler or replacing damaged sections with pressure-treated wood. Our guide will empower you to address and prevent wood rot, restoring your home's beauty and strength.

What you need to repair rotten wood
Repairing rotten wood is essential to maintaining both your home’s appearance and its structural stability. The right materials and tools are crucial for the job, particularly for areas prone to rot like window sills. Additionally, ensuring proper air circulation helps prevent future rot, minimizing moisture buildup and fungal growth. A putty knife is indispensable for applying wood filler effectively, allowing for precise shaping and smoothing of the filler into the wood. Here’s what you need to get started:
Questions You Might Have About Repairing Dry Rot Wood
Dealing with dry rot can raise numerous concerns, from handling fungus growth to preventing future issues caused by poor ventilation. How do you remove decayed wood effectively? Using a wire brush can help clear away rotted material, but what next? Additionally, how can you identify and repair wet rot, which affects damp wood, plaster, wallpaper, and carpets, leading to structural issues if not addressed? While dry rot and wet rot both damage wood, wet rot requires a different approach due to its need for moisture. Identifying wet rot involves looking for wood that has softened or darkened, indicating dampness. Repairing wet rot includes removing the source of moisture, using a wood hardener on affected areas, and improving ventilation to prevent future occurrences. Here are answers to key questions about repairing dry rot wood efficiently and thoroughly:
Types of Rotting Wood – Dry Wood Rot and Termite damage
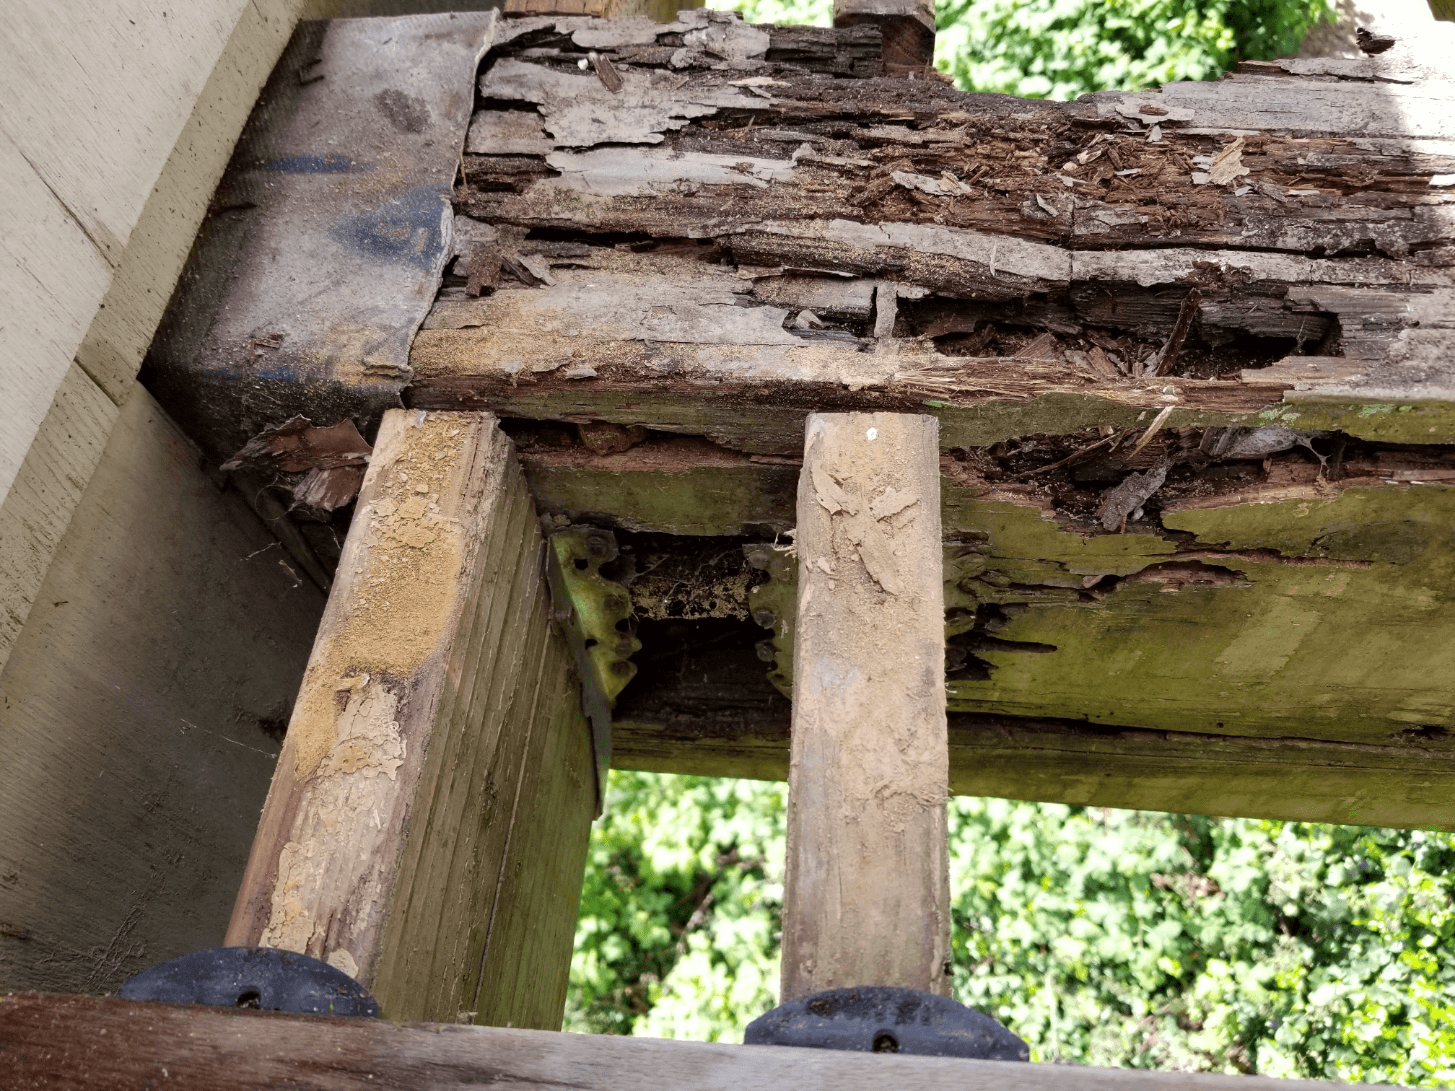
Dry Wood Rot - This type of rot, caused by fungi thriving in moist environments, leads to water damage and weakening of wooden structures, including window frames. Dry wood rot can spread quickly, crumbling wood and affecting structural integrity.
Termite Damage - Termites can devastate door frames and other wooden elements, leaving visible signs like hollowed-out sections. Unlike dry rot, termite damage is an insect infestation, but it still leads to a weakening of wooden structures, potentially exacerbated by water damage.
Distinguishing Between Them - Dry rot usually leads to crumbling or powdery wood, while termite damage shows tunnels and insect remnants. Inspect the damage structure to identify whether it’s fungal or insect-related, guiding appropriate repair actions.
How to determine if rotten wood needs to be repaired or replaced?
Assessing Damage Severity - Check the wood’s stability in areas like door frames and window frames. It's crucial to remove rotted parts until reaching healthy, solid wood to prevent further damage. If wood easily crumbles or shows deep deterioration, replacing it may be necessary to maintain structural integrity.
Repair vs. Replacement - Minor water damage or surface rot can often be repaired with fillers or hardeners, aiming to restore the solid wood's integrity. However, extensive rot, compromising strength, necessitates replacement to ensure the structure’s stability and prevent further decay.
Professional Inspection - If unsure, consulting a professional can help clarify the situation, offering insights into the extent of rot and the appropriate course of action, whether repair or replacement. This includes assessing the challenges of cutting hardwood and ensuring that only healthy, solid wood remains, considering factors like load-bearing capabilities and moisture damage.
Which wood filler to use?
Flexible Fillers for Non-Structural Repairs - For minor repairs to window frames or door frames, flexible fillers can provide seamless integration with surrounding wood, allowing easy application and sanding for aesthetic blending.
Epoxy Fillers for Structural Repairs - For areas prone to water damage or more significant decay, epoxy-based wood fillers offer durable, waterproof solutions. They restore strength and resist future rot, making them ideal for structural repairs.
Outdoor Fillers - For exterior repairs, such as window frames exposed to the elements, use waterproof fillers capable of withstanding temperature fluctuations, preventing future damage and ensuring lasting repairs. This choice is crucial to maintaining your home's durability.

Should I Repair or Replace Dry Rot?
Assessing Damage Severity - Determining whether to repair or replace dry rot depends on the extent of the decay. Inspect areas like flooring and structural elements. Minor rot in certain areas can often be repaired, while extensive damage that threatens stability may necessitate a full replacement.
Repairing Minor Rot - Small pockets of dry rot can be addressed with fillers or wood hardeners. This method can fill in gaps and reinforce the integrity of certain areas, preventing the decay from spreading and maintaining the structure's integrity.
Replacing Severely Rotted Wood - When rot deeply compromises wood like flooring or critical structures, replacement is necessary. This ensures the stability and safety of the building, preventing future damage and maintaining the integrity of the property.
Ways to Repair Rotted Wood Without Replacing It
Maintaining wooden structures and performing wood repair requires careful attention to other signs of decay beyond visible rot, such as softness or discoloration. Regular maintenance can help prevent further damage, and repairing existing rot, including wood repair for issues like wood rot and dry rot, can be done without replacement. Using filler or hardeners to sand and restore the wood’s integrity is a practical approach. Here’s how:
Repair Dry-rotted Wood by Packing It with Polyester Resin Wood Filler or Patching It with a Wooden Block
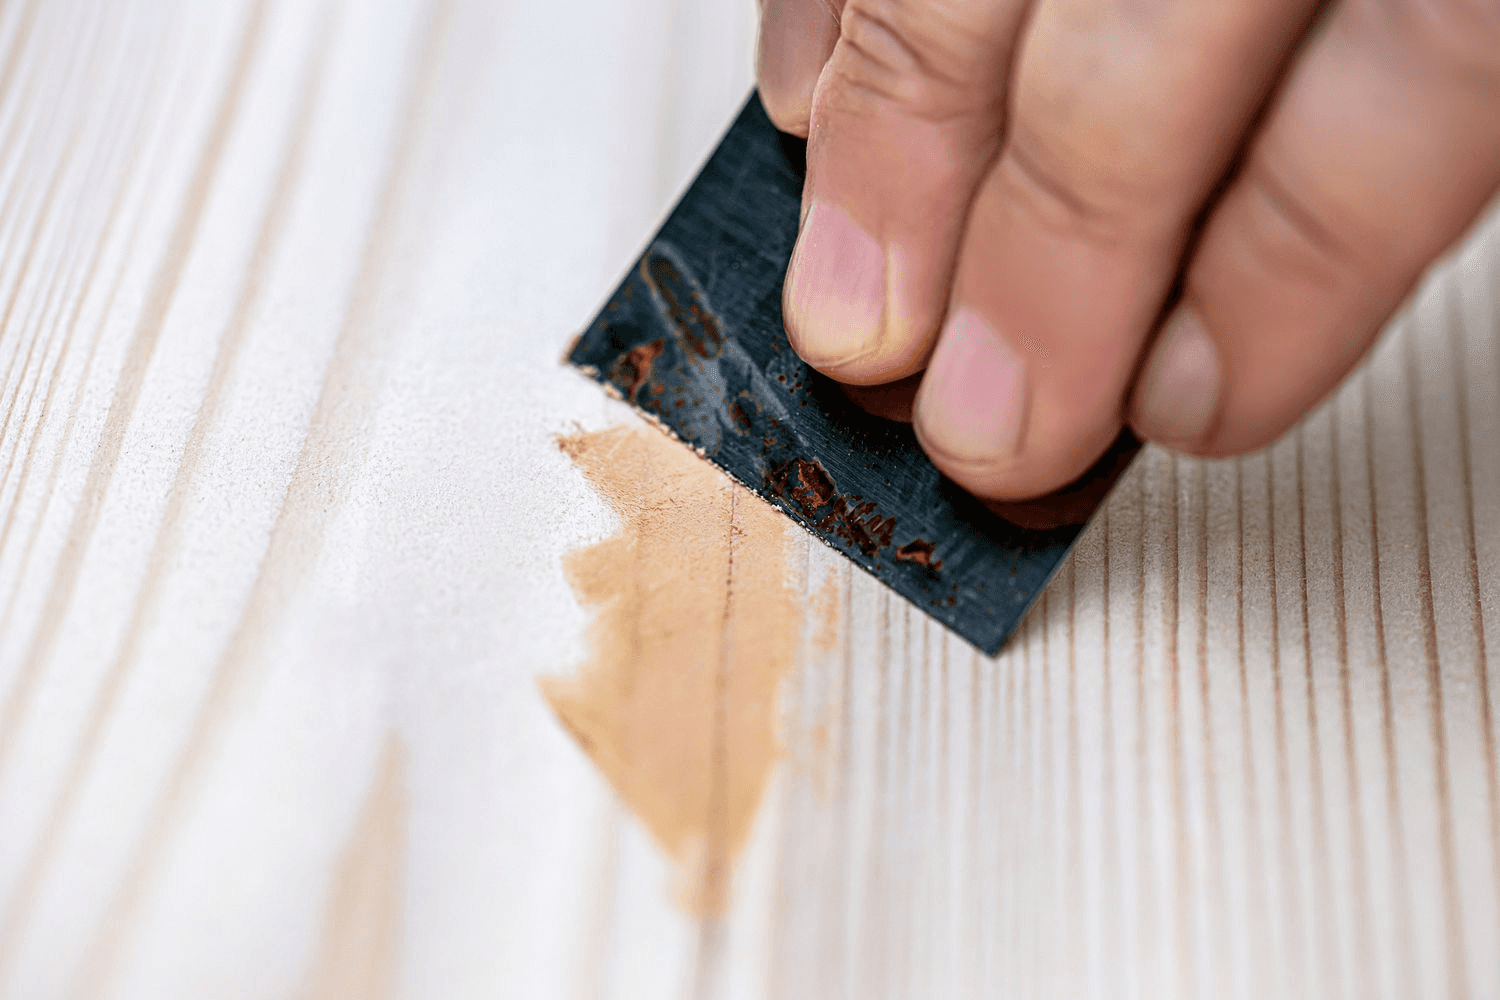
Polyester Resin Wood Filler - For minor dry rot, applying a polyester resin filler can stabilize the wood. After removing damaged material with a paint scraper, use a putty knife to pack in the filler thoroughly, ensuring it bonds tightly to the existing wood. The putty knife is also essential for shaping and smoothing the filler, allowing it to mold perfectly to the wood's surface. Let it dry completely before finishing.
Wood Block Patch - For larger rot damage, cut a patch from a matching wood block. Carefully remove the damaged area and fit the patch into place, securing it with glue or nails. This method restores the structural integrity and prevents further decay from compromising the wood.
Finishing Touches - Once patched or filled, ensure the repair blends seamlessly. Sand the area to smooth the transition between the new and existing wood, then apply a stain or paint for a polished finish. This completes the repair, restoring both function and aesthetics.
Apply wood hardener and filler
Hardener for Stability - For rotted areas, applying a wood hardener first can stabilize the existing wood, preparing it for filler. This ensures structural integrity, making it essential for restoring the wood's strength and durability.
Filler for Restoration - Once the hardener sets, apply a filler to fill gaps and rebuild the wood's surface. This helps maintain both the appearance and function of the structure, preventing further decay from spreading.
Sanding for Finishing - After the filler has dried, sand the area to create a smooth, even surface. This not only enhances the wood's appearance but also prepares it for painting or staining, completing the repair process seamlessly.
Remove the Forms and Shape the Hardened Wood Filler
Removing the Forms - Once the filler has set and dried completely, carefully remove any forms used during the repair. This reveals the hardened filler, ready to be shaped and finished to match the surrounding wood.
Shaping the Filler - Use tools like a paint scraper or sandpaper to shape the hardened filler, blending it seamlessly with the existing wood. This process restores the wood's appearance, creating a smooth transition between the repair and the surrounding area.
Finishing Touches - To complete the repair, apply a stain or paint, blending the filler with the surrounding wood. This restores the wood's aesthetics and protects it from future damage, ensuring the repair is durable and long-lasting.
Repair Broken out Areas with a Wooden Block Patch
Creating the Patch - For significant home repair, cut a wooden block patch matching the area to be repaired. Carefully remove the damaged section, ensuring a snug fit for the new block. This step helps restore structural integrity and prevents further decay.
Securing the Patch - Glue or nail the block patch into place, making sure it bonds tightly with the surrounding wood. This technique helps repair wood structures, restoring stability and preventing future damage.
Finishing Touches - Once the patch is secure, smooth the area by sanding it down. This allows for a seamless blend between the patch and the surrounding wood, completing the repair and maintaining the home's appearance.
Remove Crumbling Dry Rot and Apply Wood Hardener to Remainder
Clearing Rotted Material - To address rot in wood, first remove rotted wood and crumbling material. This step prevents the decay from spreading and prepares the area for repair.
Applying Wood Hardener - Once the rot is cleared, apply a wood hardener to the remaining wood. This stabilizes the structure, ensuring the repair process is effective and preventing further decay from compromising the wood's integrity.
Preparing for Repair - After applying the hardener, the remaining wood is ready for further home repair steps. This may include filling gaps, sanding, or applying paint, ensuring the wood is fully restored and protected against future rot.
Use a wood filler to fix and patch
Filling Gaps - Once decayed material is cleared, use a wood filler to repair wood structures, filling gaps and restoring stability. This step is essential for preventing further damage and preserving structural integrity.
Smoothing the Filler - After the filler sets, sand the area to create a smooth surface, allowing the repair to blend seamlessly with the surrounding wood. This improves both the appearance and functionality of the structure.
Final Touches - For comprehensive home repair, finish by staining or painting the filled area. This protects the wood against future decay, ensuring the repair is long-lasting and maintains the integrity and appearance of the home's wooden structures.